
First Cut Medallion: a free eight-wedge pattern to start with
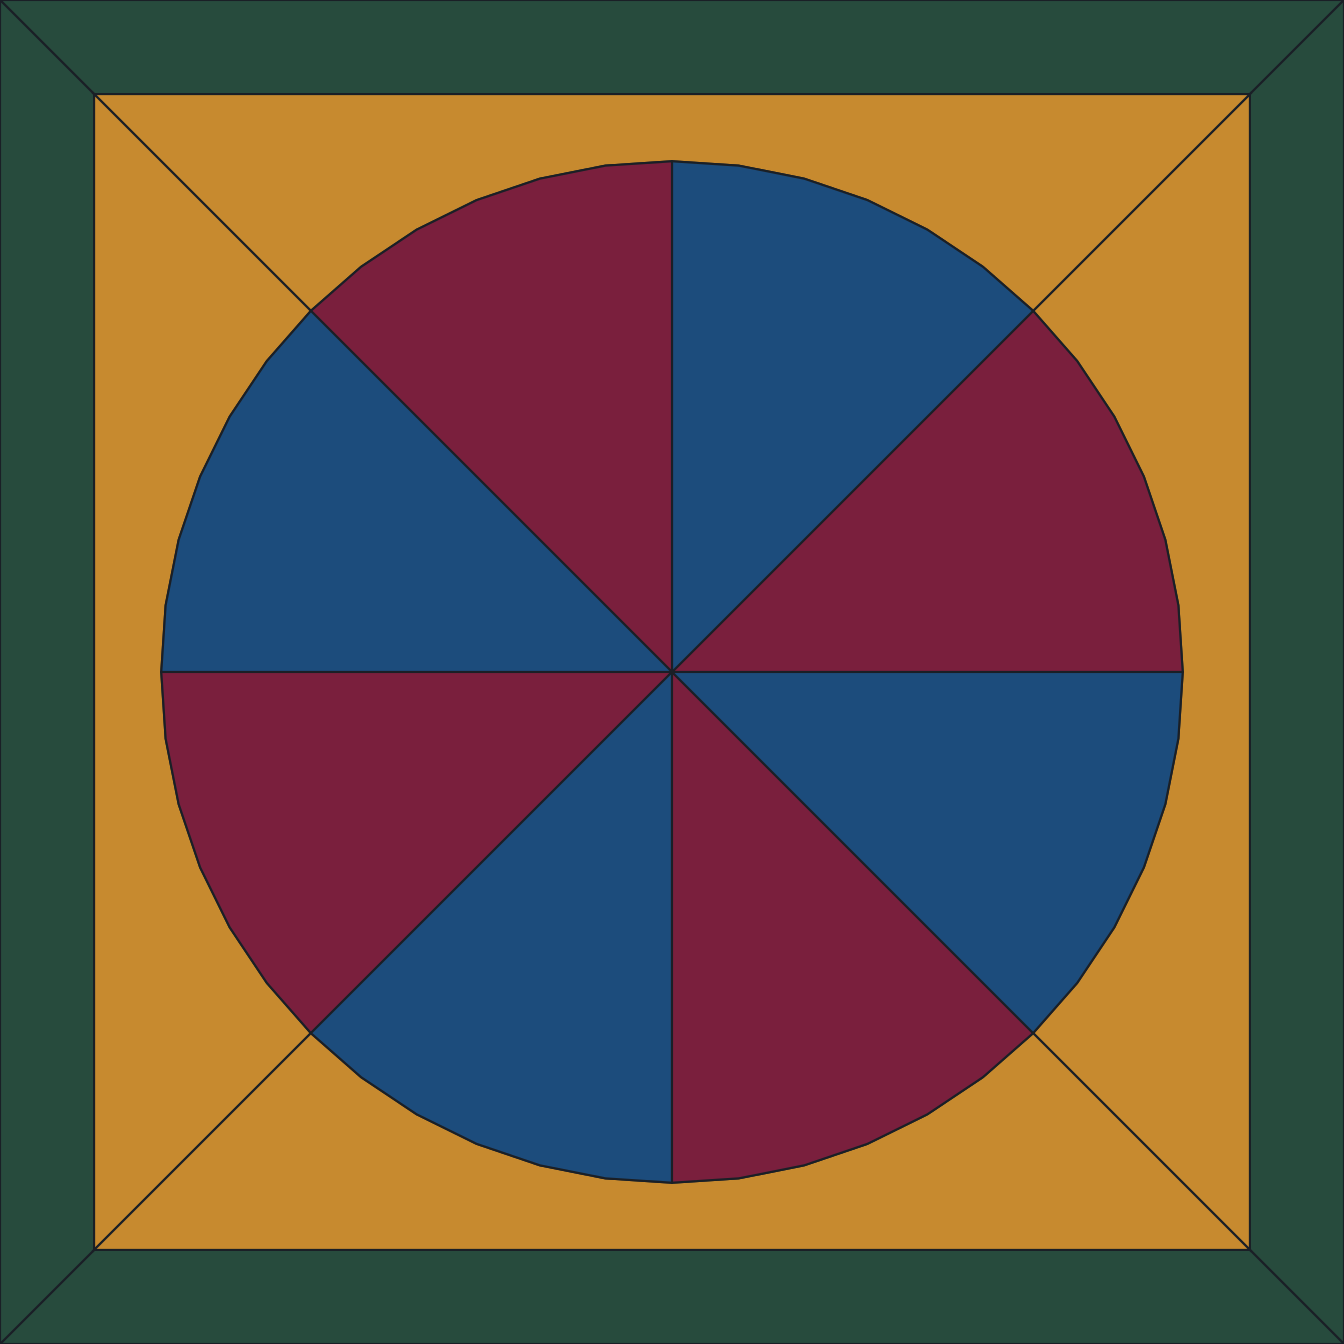
First Cut Medallion is a circular medallion cut into eight alternating wedge facets of 45 degrees each, set inside a square bordered panel with four corner background pieces. The wedges are straight radial cuts; the one ground curve in the pattern is the medallion's own outer circle, a gentle introduction to cutting a curve alongside straight lines.
Panel size runs from 6 in to 16 in. At every size in that range the minimum piece width stays comfortably above the 3/8 in cutoff and the narrowest wedge tip clears the 30 degree minimum, so this pattern has margin to spare across its whole size range.
Use the Pattern Sizer tool to pick a size and technique and see the live checks before downloading, or get the ZIP directly: full-size tiled outline, numbered piece map, color reference, cutting-margin pattern, and a glass and supply list.
Why this is a good first panel
Eight radial wedges give you eight runs at the same straight score, which is exactly how a hand learns. Eight is not a rounded-down number either: sixteen facets would bring a 22.5 degree tip to the centre of the panel, under the 30 degree minimum every pattern on this site is checked against, and a tip that sharp chips on the grinder before it ever reaches the foil. The single circular cut, the medallion's outer edge, introduces curve work on a gentle radius where a score that wanders is easy to correct on the grinder. Nothing in the pattern requires a tight inside curve, the cut that frustrates most beginners.
Cutting order
- Cut the four corner background pieces first, the largest and most forgiving shapes
- Cut the medallion circle next, taking the outside curve in several relieving scores rather than one
- Cut the wedges last, working around the circle so any drift is spread rather than accumulated
- Dry lay the whole panel on the printed pattern before grinding anything to final size
Glass choices
Alternating wedges want two glasses that differ in value, not just in hue: a pale opalescent against a mid cathedral reads clearly from across a room, while two colors of similar lightness turn to mush. The corners are the place for a quiet texture, since their job is to frame rather than compete.
Bench setup, tools, and working dimensions
Set the printed pattern on a flat board at least 2 in larger than the chosen panel on all sides. Tape the paper down, then cover it with clear film so water from grinding and flux residue cannot swell the paper. For a 6 in panel, a 12 in by 12 in board is workable. For a 16 in panel, use a board near 22 in by 22 in so your hands and straightedge are not hanging over the edge.
Use a glass cutter in good condition, running pliers, grozing pliers, a permanent fine marker, a cork backed steel ruler, pattern shears if you are using paper templates, and a grinder with clean water in the sponge. Keep a small square on the bench to check the border pieces. For copper foil work, a 7/32 in foil is a common starting point for ordinary art glass thickness, but match the foil to the glass you actually use and to the solder line you want.
| Panel size | Useful board size | Recommended extra glass per color | Practical handling note |
|---|---|---|---|
| 6 in | 12 in by 12 in | About 20 percent | Small pieces move easily, so hold them with fingertips close to the score. |
| 10 in | 16 in by 16 in | About 15 percent | This is a comfortable practice size for scoring and grinding. |
| 12 in | 18 in by 18 in | About 15 percent | Check the medallion circle often because small flat spots become visible. |
| 16 in | 22 in by 22 in | About 10 to 15 percent | Support the glass fully when breaking long border and background cuts. |
Detailed build procedure
Start by marking every template with its number and glass choice before cutting anything. If you separate the paper pieces first, write the same number on the glass with a marker as soon as the shape is traced. This avoids two common mixups, reversing a wedge and swapping adjacent background corners.
Score straight cuts with one continuous pass, firm enough to make a clean hiss but not a crushed white line. Start 1/16 in in from the edge and finish 1/16 in before the far edge when the glass edge is rough. On clean factory edges, you can run from edge to edge. Break each score promptly, because old scores are less predictable after the sheet has been handled.
For the circular outside edge of the medallion, use several shallow relief cuts into the waste area. Space them about 1/2 in to 3/4 in apart on a small panel and about 1 in apart on a larger panel. Remove the waste in small bites with running pliers and grozing pliers. Do not try to snap the full circle away in one break unless the glass is very cooperative and you have enough waste around the line.
Grind only to the printed line, not past it. After every two or three pieces, return them to the covered pattern and check the joint spacing. A copper foil panel usually tolerates a small even gap better than a tight joint that forces the circle out of round. If a piece rocks against its neighbor, mark the contact point, grind only that point, rinse, and test again.
Frequent mistakes and how to recover
- The center points do not meet cleanly. Do not grind every wedge tip shorter. Find the one or two pieces that are too long or off angle, then adjust those only. A small central gap can be filled during soldering, but a wide uneven hole will draw the eye.
- The circle has flat spots. Mark the high points with a pen while the medallion is on the pattern. Grind with light side to side movement, then rotate the piece and check again. Removing glass from the whole curve makes the medallion undersized, so correct only the flats.
- A wedge breaks across the narrow end. Recut that wedge rather than trying to hide the fracture. The tip is a structural and visual point, and a glued or foiled crack there usually remains visible after soldering.
- The border is no longer square. Pin or tack the outside edges against a square reference before soldering. Measure both diagonals. If the diagonals differ by more than 1/8 in on a 12 in panel, loosen the layout and correct it before fluxing.
- Foil overlaps badly at the wedge tips. Burnish the sides first, then fold the smallest end last. Trim bulky foil with a sharp knife before soldering, not after solder has locked the lump in place.
If a part becomes too small by about 1/32 in, it may still be usable if the gap is even and the neighboring pieces keep the drawing true. If the gap reaches about 1/16 in along a visible radial line, recutting is usually faster than trying to hide the error with solder. For more general handling questions, see the FAQ.
Special cases and size choices
Choose the lower end of the size range if your goal is one evening of cutting practice and a quick soldering session. Choose 10 in to 12 in if you want the easiest balance between hand room, curve control, and material use. Choose 16 in only if your glass sheet is flat enough to keep long straight cuts from wandering and your work board can support the whole panel without flex.
Textured glass needs a decision before tracing. Put the smoother side up for cutting if the texture is deep, because the cutter wheel follows a flatter surface more reliably. If the textured face must be outward in the finished panel, remember to reverse the template when needed so the finished orientation is correct.
Opalescent glass can hide score lines. Use a bright side light, not overhead light only, and mark the end of each score before placing the ruler. Cathedral glass shows every mismatch more clearly, so keep the radial joints even and avoid grinding one side of a wedge more than the other. If you are unsure about technique limits, check the FAQ before scaling the pattern or changing the construction method.
Frequently asked questions
Do I need to register to download this pattern?
No. The download link on the Pattern Sizer tool and on this page goes straight to the ZIP file.
Is First Cut Medallion included in the paid bundles?
No. It stands on its own as the free sample; the Beginner Pack and Complete Collection bundle the paid patterns.
Read next
- Crescent Moon: a full moon panel for your first ground curve: Crescent Moon: a two-arc crescent in a banded night sky with diamond stars, a beginner pattern with one ground curve, sized 10 to 24 in, 25 pieces.
- Your files: Access your purchased pattern downloads here.
- How much glass do I need? A per-color calculator: Calculate how much glass you need per color for any panel size, with a 15 percent waste allowance built in, plus the formula behind the number.