
Ridge Line: a mountain range over a still lake
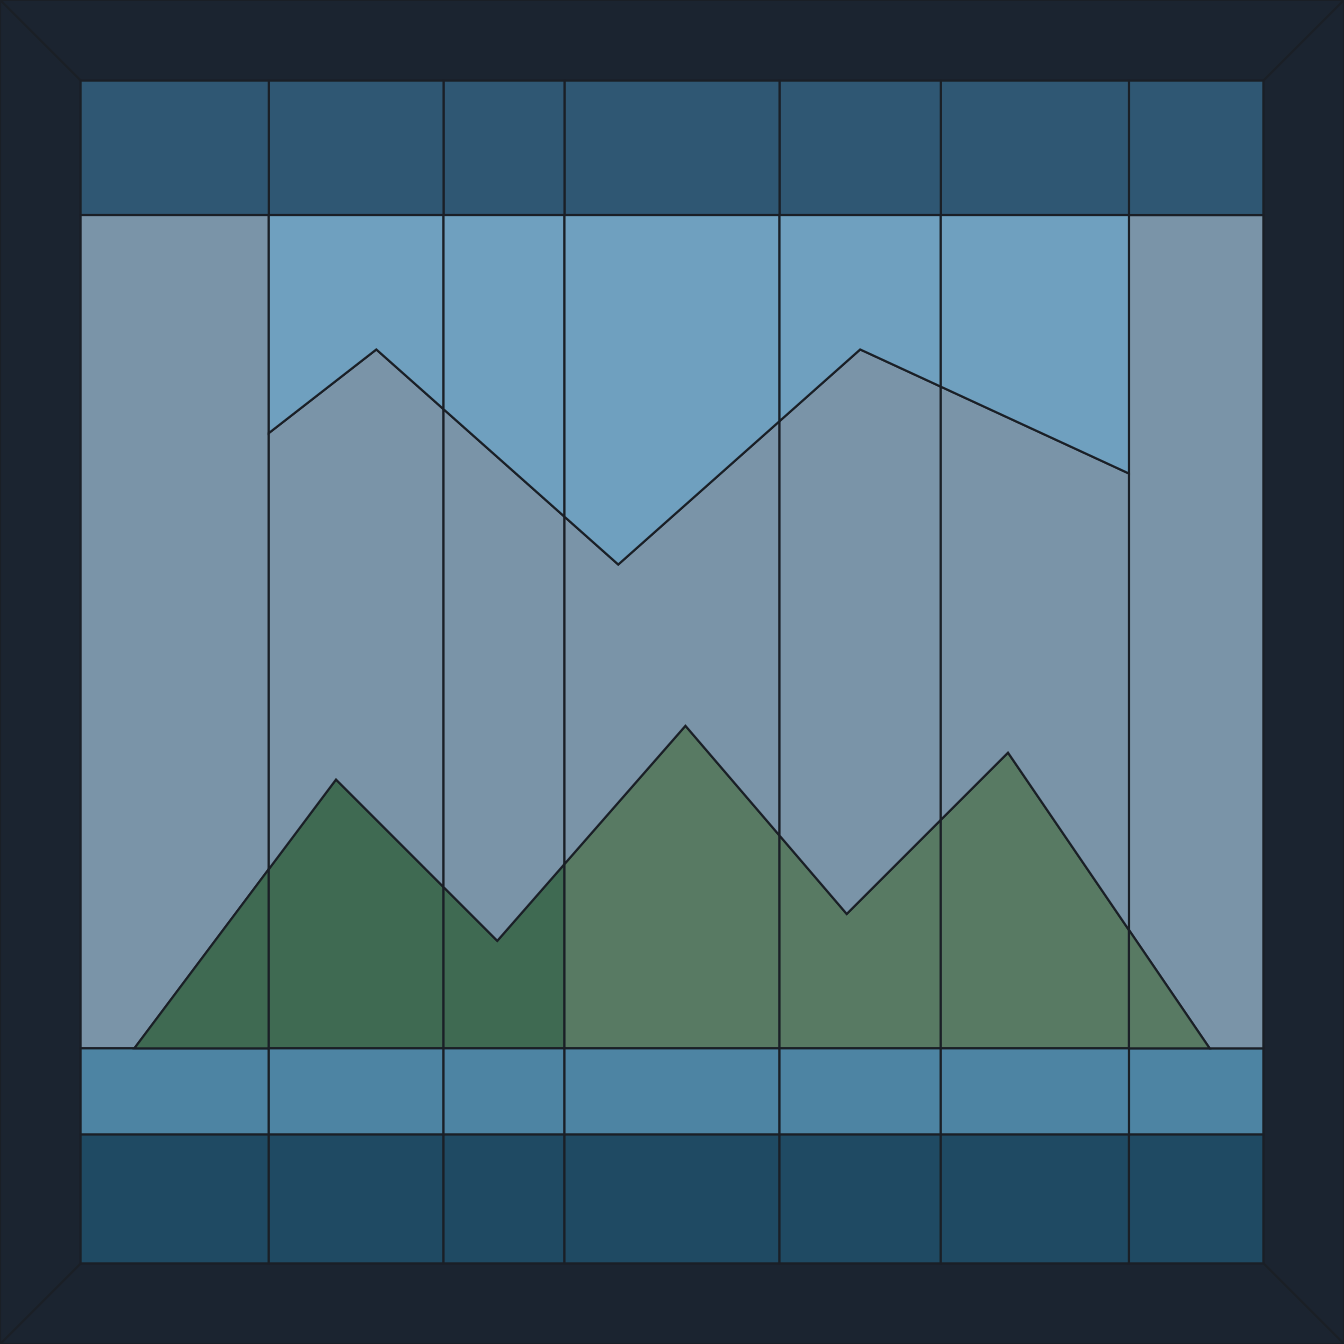
Ridge Line sets two mountain ridges, a jagged front range and a taller, softer back range behind it, above a still lake on a raised shoreline. The lake below is a two-tone reflection, a paler band near the shore and a deeper band beyond it. Forty-four pieces total, sky, ridges and lake all split into safe-sized columns and bands, every cut a gently sloped straight line rather than a curve.
Panel size runs from 8 in to 24 in. Every ridge segment holds a wide angle margin against the vertical dividers that cross it, so the pattern keeps its cut safety margin across the full size range while still reading clearly as a landscape once leaded and lit.
The download includes a full-size tiled outline, a numbered piece map, a color reference sheet, a cutting-margin pattern, and a glass and supply list.
Two ranges, two values
The illusion of depth comes from value alone: the back range must be lighter and lower in contrast than the front range, the way distant hills wash out in real air. Pick those two glasses side by side in daylight before cutting. If they read as the same weight when you squint, the panel will look flat no matter how well it is cut.
The lake band
The two tone reflection works because the paler band sits nearest the shore and the deeper band lies beyond it, which is the reverse of what most people expect. Keep the horizontal seam between them dead level: a lake line that slopes by a millimetre reads as wrong instantly, in a way a jagged ridge never does.
Cutting the jagged front range
Sharp peaks are where beginners lose pieces. Score the long shallow slopes first, break them, then come back for the short steep ones, and relieve each point with a second score rather than running one score into a narrow tip. Grozing pliers take the last millimetre off a peak far more safely than a grinder does.
Buying the glass
The glass list in the download gives square inches per color for the size you chose. Buy more than that: between offcuts, a score that runs off line and the occasional piece that breaks on the grinder, most cutters add 20 to 25 percent, and more when a color has strong directional streaking that has to run the same way across several pieces. Glass from a second sheet rarely matches the first, so buying short is the expensive mistake.
Work sequence from printout to solder
Print the tiled outline at 100 percent and measure the control square before taping the sheets. A printer error of 1 percent changes a 24 in panel by almost 1/4 in, enough to make border zinc or lead came fight the drawing. Tape the pattern from the centre outward, then tape the whole sheet to a flat board so the lake seam and the lower edge cannot creep while you trace.
Make two working copies if possible. Keep one clean as the assembly map and cut the other into templates. Number each template before separating it, and add a grain arrow on every sky, mountain and water piece if the glass has a direction. For a landscape panel, a consistent left to right streak usually reads calmer than mixed streak directions.
- Cut the straight outside border pieces first, then the large sky fields, then the back ridge, the front ridge, the shoreline, and the lake bands.
- Dry fit each horizontal band before moving to the next band below it. A 1/32 in error repeated through several rows can become a visible lean at the side border.
- Leave about 1/32 in clearance for copper foil work, or follow the came heart allowance if building with lead came.
- Grind only until the piece fits the paper line. Do not grind mountain points blunt unless the layout specifically leaves room for that loss.
- When all pieces are fit, wash and dry the glass before foiling. Dust in the foil glue line causes lifted foil near peaks and narrow shore pieces.
For soldering, tack the four corners first, then tack across the main horizontal seams. Work from the centre outward in short passes of 3 in to 5 in. Let the panel cool between passes. Long uninterrupted heat along the lake seam can bow a narrow band even when the cutting is accurate.
Equipment, clearances and working dimensions
A basic stained glass setup is enough because the pattern uses straight scores. The useful difference is precision, not force. Use a fresh cutter wheel, running pliers with aligned jaws, grozing pliers for points, a grinder with a dressed bit, a steel ruler with a cork back, a square, layout pins, and a flat board at least 2 in larger than the selected panel size on all sides.
| Item | Practical figure | Why it matters |
|---|---|---|
| Printer scale check | 100 percent, error under 1/32 in over 4 in | Keeps the full border from growing or shrinking during assembly. |
| Foil clearance | About 1/32 in between adjacent glass edges | Leaves room for foil thickness and solder without forcing the panel wide. |
| Minimum safe offcut | About 1/2 in beyond the score line | Gives running pliers enough glass to grip without crushing a point. |
| Grinding removal | Usually under 1/16 in | More than this means the cut line should be corrected on the next piece, not hidden at the grinder. |
| Assembly board margin | At least 2 in around the panel | Provides space for stops, pins and a square without disturbing the glass. |
If the panel is near 8 in wide, the smallest ridge pieces will feel stiff because there is less edge length to hold. Work over a rubber mat so small parts do not skate away. If the panel is near 24 in wide, the issue changes to accumulated tolerance. Check the outside rectangle with a square after every two or three rows, not only at the end.
Frequent mistakes and recovery
If a mountain peak breaks off by less than 1/8 in, do not recut immediately. Put the piece in position and check whether foil and solder will restore the visual point. A tiny missing point inside a dark front ridge often disappears after patina. A missing point against pale sky is more visible and usually deserves a recut.
If the lake line is not level during dry fit, correct the cause before soldering. First check whether the paper pattern has shifted. Then measure the height of the lake seam at the left side, centre and right side. A difference of more than 1/16 in across a medium panel is visible. Regrind the high edge only if the opposite piece still has enough glass to keep its shape.
If a vertical divider looks too strong through the ridges, the glass choice may have too much contrast between adjacent pieces. Recovery is possible before soldering by swapping two neighbouring mountain pieces of similar size or by rotating a streaked piece 180 degrees. Do not rely on solder width to hide a value mistake, because a bright seam can make the contrast stronger.
If foil lifts on a sharp corner, peel it back to the nearest straight section, clean the glass with alcohol, dry it, and refoil that edge. Press the foil down with a fid from both faces. For more troubleshooting on material handling, see the FAQ.
Special cases for scale, glass and installation
For a small cabinet insert, choose quieter glass with fine texture. Large streaks can occupy an entire mountain piece and make the ridge look blotchy. For a larger window panel, mild variation is safer because uniform glass across wide sky or water areas can look flat under daylight.
If the panel will hang in front of a bright window, test the mountain glasses with a lamp behind them, not only on the bench. Some grey, blue and green glasses reverse their apparent value when backlit. The back ridge must stay lighter than the front ridge under the actual viewing light.
If using lead came instead of copper foil, check the heart thickness before cutting every piece. A common hobby came heart can take more space than foil, so the glass must be cut slightly smaller than the printed opening. Keep the outer border square with temporary wooden stops, because came can let the rows drift until cementing or final solder joints lock the panel.
For bathroom or kitchen placement, avoid leaving flux residue along the lake seam and lower border. Rinse, neutralise if that is your normal shop practice, and dry the panel standing upright so water does not sit in the solder lines. Moisture trapped at the bottom edge is a common cause of dull solder and stained framing material.
Read next
- Tiffany Arch Fan: a half-circle dome fan over a paneled sill: Tiffany Arch Fan: a true half-circle dome fan over a paneled sill, in the traditional stained glass lampshade style, sized 10 to 24 in, 30 pieces.
- Tulip Bloom: a stylized tulip over a paneled sky: Tulip Bloom: a stylized tulip with a three-petal crown, straight stem, and two curved leaves, over a paneled sky, sized 10 to 24 in, 21 pieces.
- About Glass Cut Patterns: About Glass Cut Patterns: original vector-built stained glass patterns run through automated cuttability checks at every size, made by WEABLE SAS.